If you’ve ever played around with old versions of Mac OS, you’ll be familiar with the concept of “desk accessories.” These were small programs that could run alongside the currently running main app (the original Mac OS could only run one program at a time). One of the desk accessories was an implementation of the classic “15 puzzle”, programmed by Andy Hertzfeld. Another example of this type of puzzle is an easter egg in the classic NES game, Final Fantasy.
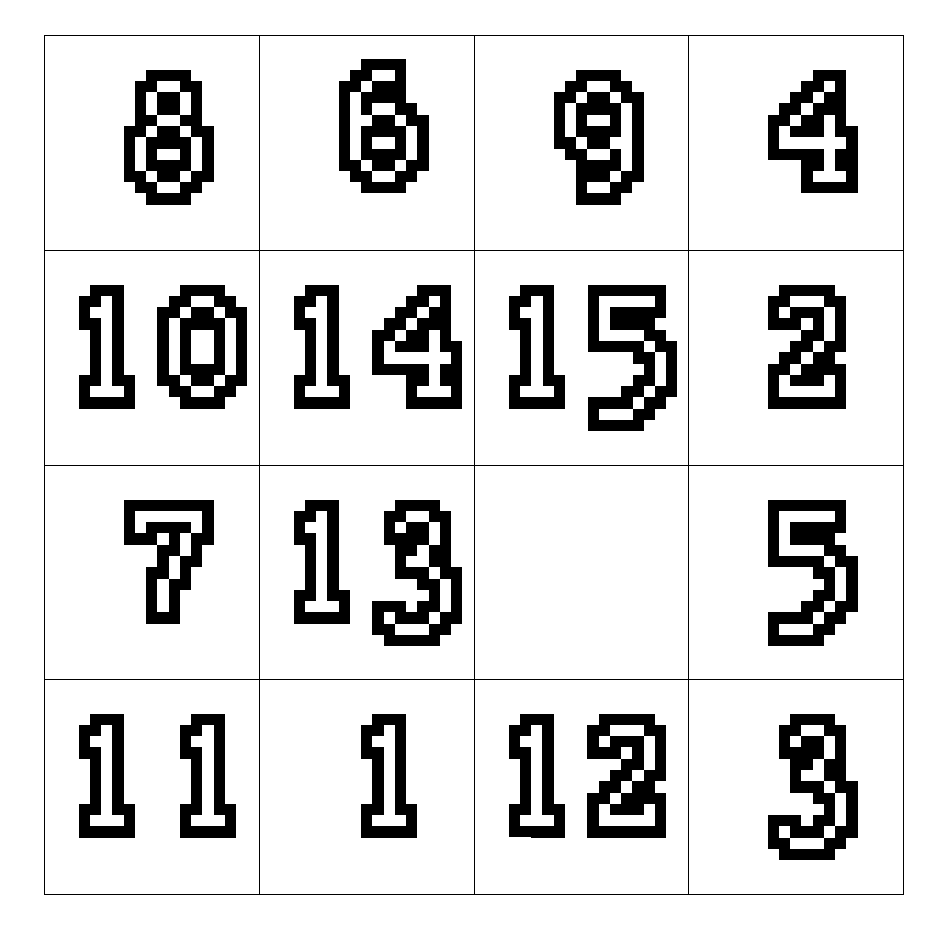
This sort of game is a perfect candidate for a grid, and is an especially good one to start off with. The puzzle board can be represented as a 4x4 grid, with each cell containing a value from 1 — 16 (16 being the “empty” space). The grid can be initialized randomly, then play occurs by clicking or tapping a tile that is next to the empty space. The tile then moves into the empty spot; the game continues until all the tiles are sorted from low to high.
Setup is simple — we have a list of strings that represent each tile, and randomly insert them into the 4x4 “state” array. Download the Waffle project template and make these changes at the start of the game.js file:
- const rows = 10;
- const columns = 10;
+ const rows = 4;
+ const columns = 4;

Waffle.init(rows, columns);

+ let tiles = ['one', 'two', 'three', 'four', 'five', 'six', 'seven', 'eight', 'nine', 'ten', 'eleven', 'twelve', 'thirteen', 'fourteen', 'fifteen', 'empty'];
+
+ // (randomly) initialize the grid with all of the tile values
+ let nextState = Waffle.state;

+ for (let y = 0; y < Waffle.rows; y += 1) {
+   for (let x = 0; x < Waffle.columns; x += 1) {
+     // choose a random value from the remaining tiles
+     const randomIndex = Math.floor(Math.random() * tiles.length);
+
+     // `splice` removes the value from the array, so it can't be used twice
+     // https://developer.mozilla.org/en-US/docs/Web/JavaScript/Reference/Global_Objects/Array/splice
+     nextState[x][y] = tiles.splice(randomIndex, 1)[0];
+   }
+ }
+
+ // update the game state
+ Waffle.state = nextState;

Waffle.onKeyDown(({ key }) => {
Add the following at the end of the main.css stylesheet. These class names match the strings that we used to represent each tile. So when a grid cell has a value of one, then the .one CSS rule gets applied to it. This list of rules specifies the path to a background image file, and says that it should be centered and take up 100% of the available space. You can either make your own numbered tile images, or download some. Make sure to put them in a subdirectory named images.
  .highlight {
    background-color: blueviolet;
  }
}
+
+ #grid div { image-rendering: crisp-edges; }
+ .one { background: url('images/1.png') center/100%; }
+ .two { background: url('images/2.png') center/100%; }
+ .three { background: url('images/3.png') center/100%; }
+ .four { background: url('images/4.png') center/100%; }
+ .five { background: url('images/5.png') center/100%; }
+ .six { background: url('images/6.png') center/100%; }
+ .seven { background: url('images/7.png') center/100%; }
+ .eight { background: url('images/8.png') center/100%; }
+ .nine { background: url('images/9.png') center/100%; }
+ .ten { background: url('images/10.png') center/100%; }
+ .eleven { background: url('images/11.png') center/100%; }
+ .twelve { background: url('images/12.png') center/100%; }
+ .thirteen { background: url('images/13.png') center/100%; }
+ .fourteen { background: url('images/14.png') center/100%; }
+ .fifteen { background: url('images/15.png') center/100%; }
+ .empty { background: url('../images/empty.png') center/20%; }
Save the game.js and main.css files, and load the index.html file in your browser (File → Open File → index.html). You should see a 4x4 grid, filled with sixteen different tiles in randomized locations. Reload the page to make sure they change every time.
At this point, we’ve got the core of the game set up. A logical next step is to add support for user interaction. For browser games, this can be handled by a JavaScript event listener. Every interaction that a user does within the context of a web page (moving a mouse, clicking, tapping) can get a JavaScript function attached to it, so that game logic can be executed. In this case, we want to know when a player clicks (or taps) on the game grid; the idea being that if they tap on a tile that’s next to the empty spot, the tapped tile moves.
Waffle.js has helper functions that try to abstract away some of the garbage that we don’t care about. The game.js file in the project template already has an example of one of them: Waffle.onPointDown. This function takes another function as an argument, which passes in an object with x and y keys. These are the Cartesian coordinates of the tile on the grid that the user clicked. Delete some of the existing code like so:
// update the game state
Waffle.update(nextState);

- Waffle.onKeyDown(({ key }) => {
-   console.log(`pressed ${key}`);
- });

Waffle.onPointDown(({ x, y }, { primary, secondary }) => {
  console.log(`${secondary ? 'right' : 'left'}-clicked cell (${x}, ${y})`);

- /* replace this with your own code! */
- const nextState = Waffle.state;
-
- if (Waffle.isEmpty(nextState[x][y])) {
-   nextState[x][y] = 'highlight';
- } else {
-   nextState[x][y] = '';
- }
-
- Waffle.state = nextState;
});
Save, then reload index.html in your browser. If you have the developer tools open (Tools → Browser Tools → Web Developer Tools in Firefox) and click around in the grid, you’ll see the debug message with the (x, y) values of the tile you clicked.
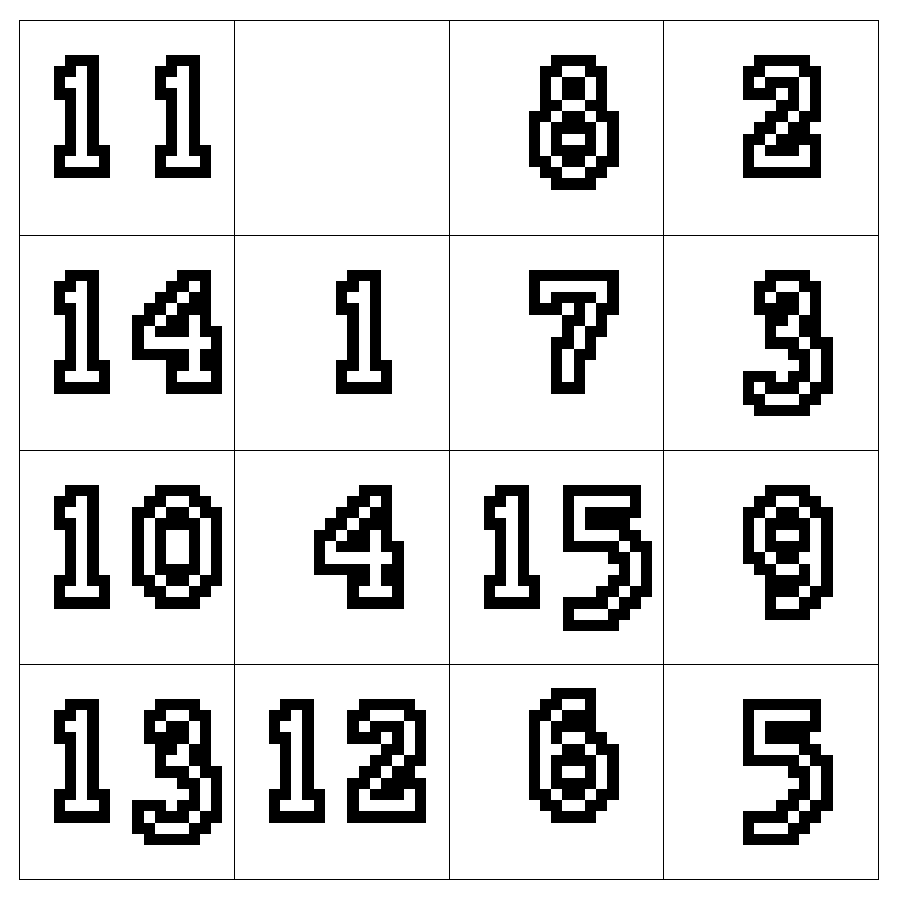
Now we can get on to adding some actual game logic. What we want to do is check if any of the tiles next to the one we clicked is empty. For this type of game, we only have to check in the four cardinal directions, like so (imagine x is the clicked tile):
[ ][ ][ ][ ]
[ ][*][ ][ ]
[*][x][*][ ]
[ ][*][ ][ ]
Waffle.js has yet another “helper” function that can get the (x, y) values of those neighbors — named, appropriately enough, Waffle.getNeighbors. It will return an array of the four neighboring cells. Note however that it won’t return cells that are outside the bounds of the grid (for example, if you click in a corner). We can run this function when a player clicks the grid, then check if any of the neighboring tiles are empty. If one of them is, we will swap values between that empty tile and the one the player touched. This gives the illusion of tiles sliding around the grid.
Waffle.onPointDown(({ x, y }, { primary, secondary }) => {
  console.log(`${secondary ? 'right' : 'left'}-clicked cell (${x}, ${y})`);

+ const nextState = Waffle.state;
+ const neighbors = Waffle.getNeighbors({ x, y });
+
+ // check each neighboring cell
+ for (let i = 0; i < neighbors.length; i += 1) {
+   const neighbor = neighbors[i];
+
+   if (nextState[neighbor.x][neighbor.y] === 'empty') {
+     // if a neighboring cell is empty, swap it with the one that was clicked
+     nextState[neighbor.x][neighbor.y] = nextState[x][y];
+     nextState[x][y] = 'empty';
+
+     // show the change
+     Waffle.state = nextState;
+
+     // we don't need to check any of the other neighbors
+     // once we've found an empty cell, so can break out of the loop
+     break;
+   }
+ }
});
Save the game.js file and reload the page. You should now be able to click numbers next to the empty cell, and watch them move around. This is all the functionality that is required to successfully solve the puzzle!
However, it would be nice to provide the player some sort of confirmation that they finished the game. To that end, we can write up a function that checks whether or not the contents of each grid cell is sorted. A quick way to do this is to make an array of strings with the tile values (similar to the one we used to initialize the game board), then compare the contents of each grid cell with the corresponding value of an incrementing index. For example, the cell at (0, 0) should be one, the cell at (1, 0) should be two, etc. Add the following function anywhere in game.js:
+ const hasWonGame = () => {
+   const state = Waffle.state;
+   const tiles = ['one', 'two', 'three', 'four', 'five', 'six', 'seven', 'eight', 'nine', 'ten', 'eleven', 'twelve', 'thirteen', 'fourteen', 'fifteen', 'empty'];
+
+   // iterate through the rows/columns and expect the value of each cell to match
+   // the ordered `tiles` list. we put the y loop first, so the grid
+   // values can be checked like this:
+   // [ 1][ 2][ 3][ 4]
+   // [ 5][ 6][ 7][ 8]
+   // [ 9][10][11][12]
+   // [13][14][15][16]
+   let index = 0;
+   for (let y = 0; y < Waffle.rows; y += 1) {
+     for (let x = 0; x < Waffle.columns; x += 1) {
+       if (state[x][y] !== tiles[index]) {
+         console.debug(`${tiles[index]} is not in the right position`);
+         return false;
+       }
+
+       index += 1;
+     }
+   }
+
+   return true;
+ };
We can now use this function at the end of Waffle.onPointDown to show an alert popup when the player solves the puzzle:
      // we don't need to check any of the other neighbors
      // once we've found an empty cell, so can break out of the loop
      break;
    }
  }
+
+ if (hasWonGame()) {
+   Waffle.alert('Congratulations, a winner is you!');
+ }

});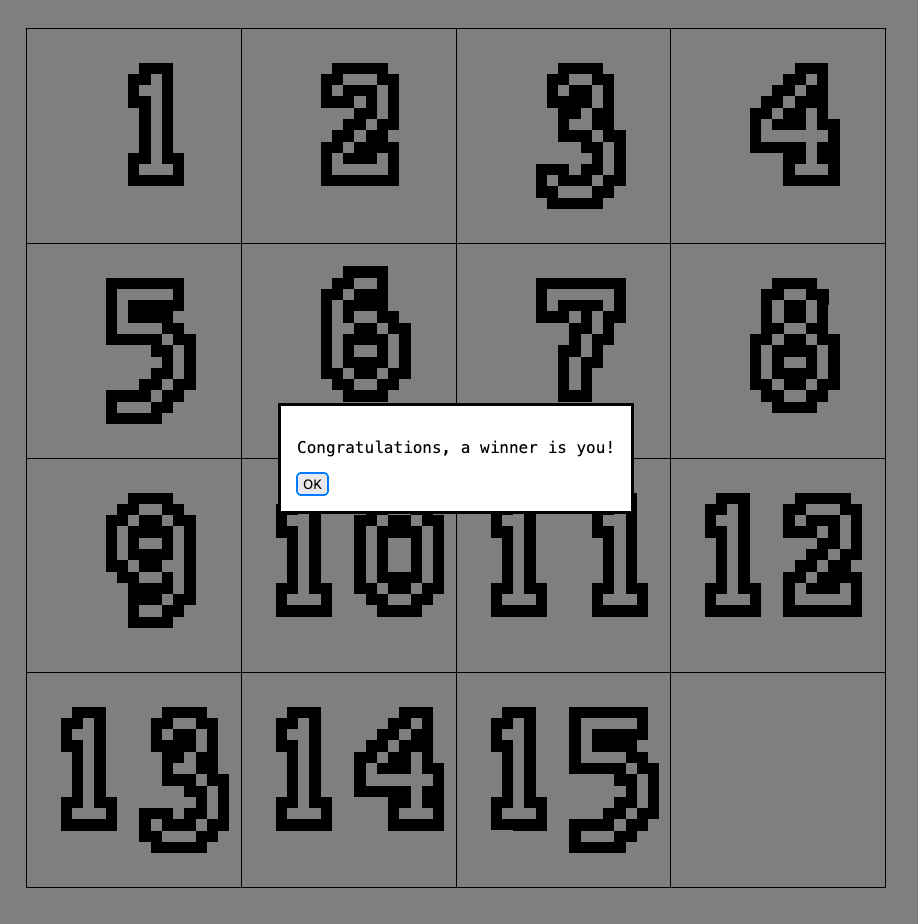
We now have a completed 15 puzzle game! Now you can get frustrated for hours on end by trying to make the last few numbers move to the correct spaces.
Extra Credit
For extra credit, add a “reset” feature to the game. In order to do this, you could make a function that contains the same logic that is at the start of the game.js script, which initially populates the grid with tile values. Then when a button is clicked or a key on the keyboard pressed, that function could be called. For example, if you wanted to make the “escape” key reset the game, you could do something like this:
+ const reset = key => {
+   if (key !== 'Escape') {
+     return;
+   }
+
+   // your logic goes here
+ };
+
+ Waffle.onKeyDown(reset);